部署Hexo.

部署到云服务器
如果你有自己购买的云服务器,可以把自己的项目部署在云服务器上
# Centos使用root用户执行
$ yum install git
# 验证安装了git
$ git --version
# 新增加一个git用户
$ useradd git
$ passwd git

# 切换目录
$ cd /home/git/

# 创建项目根目录
$ mkdir -p project/hexo-blog

# 创建仓库并初始化
$ mkdir repos && cd repos # git仓库
$ git init --bare hexo-blog-repo.git  # 新建一个仓库

# 创建一个钩子函数
$ cd hexo-blog-repo.git/hooks/
$ vim post-receive
# 内容如下,自动部署内容
#!/bin/bash
git --work-tree=/home/git/project/hexo-blog --git-dir=/home/git/repos/hexo-blog-repo.git checkout -f

# 4.修改权限
$ chmod +x post-receive
$ exit
nginx上指定静态目录server { listen 80; server_name localhost; #access_log /var/log/nginx/host.access.log main; location / { root /home/git/project/hexo-blog/; index index.html index.htm; } }配置
Hexodeploy: type: 'git' repository: server: git@110.11.11.11:/home/git/repos/hexo-blog-repo.git # server: root@ssh.example.com:/roog/git/repos/hexo-blog-repo.git # git账户, 110.11.11.11远端IP地址 branch: master执行
hexo clean && hexo g -d会自动推送到远端服务器上.创建的网页可以通过
IP访问也可以域名访问.
部署到Github
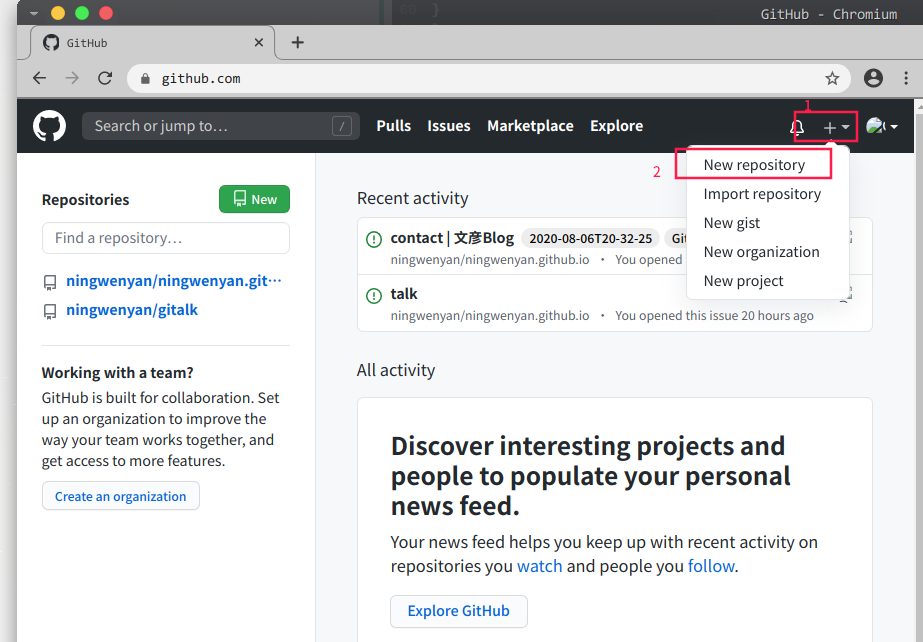
1.创建GitHub
建议使用
outlook邮箱创建,其他邮箱qq\163大概率会屏蔽github的邮件.
2.创建仓库
可以直接创建为
<your_github__uesrname.github.io>,这样可以直接访问your_github__uesrname.github.io得到网站.
3.部署
如果你没有使用过
git,需要像配置一下gitgit config --global user.namee "yourname" git config --global user.email "youremail@xxx.com"然后生成
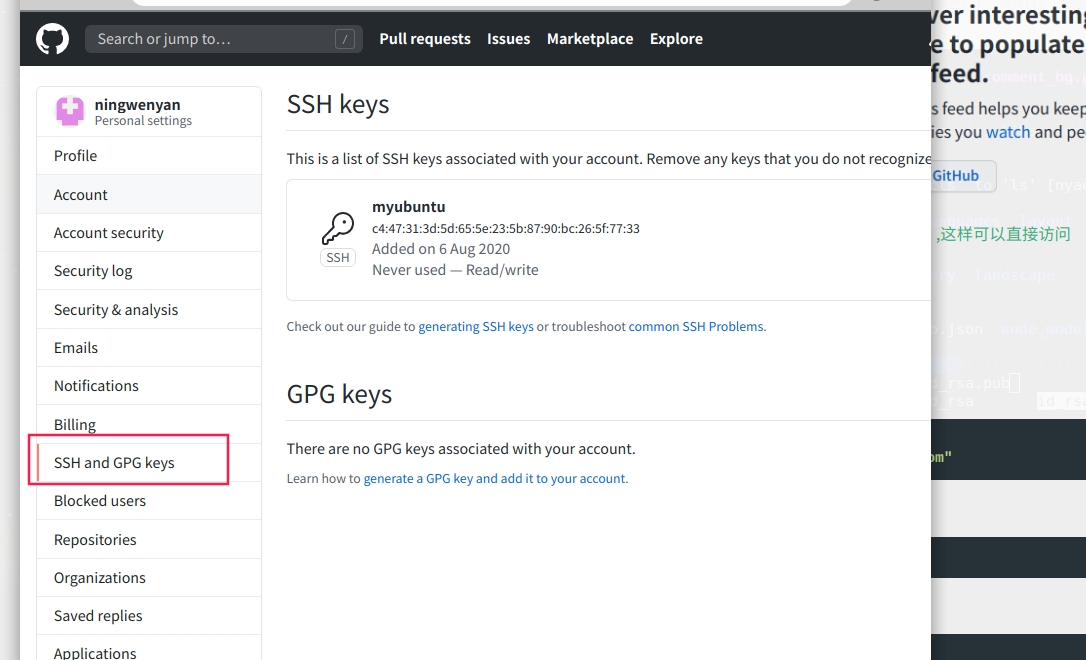
ssh_keyssh-keygen -t rsa -C "youremail@xxx.com"这样会在你的目录中生成公钥文件
❯ cat ~/.ssh/id_rsa.pub打开
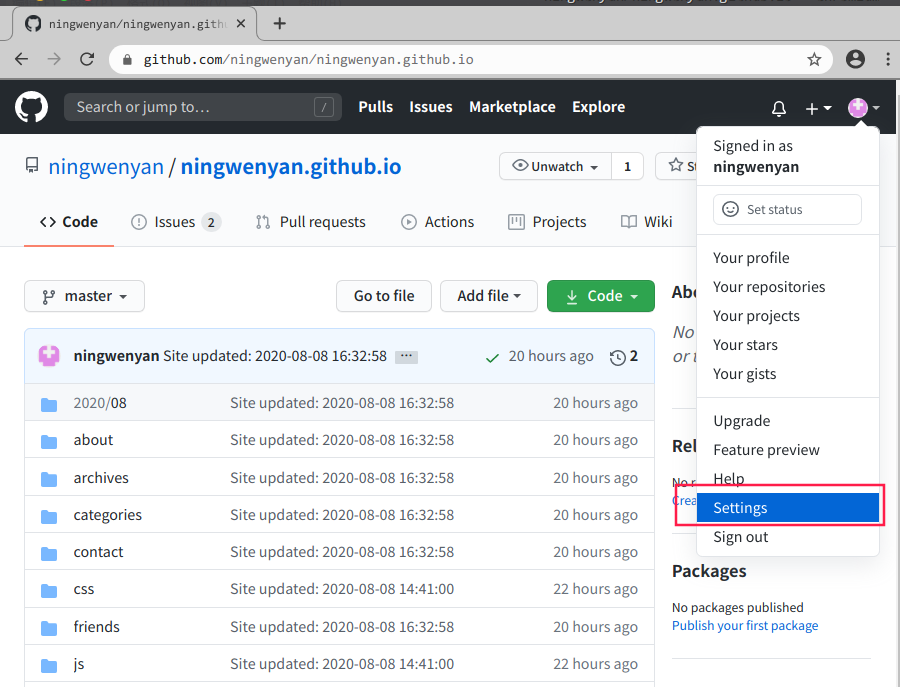
github,把公钥写入到网站中
修改根目录下的主配置文件
config# 大约在109 deploy: type: git repository: https://github.com/ningwenyan/ningwenyan.github.io branch: master
repository指定自己的仓库指点完毕后,就可以是使用
hexo d来推送自己的网站
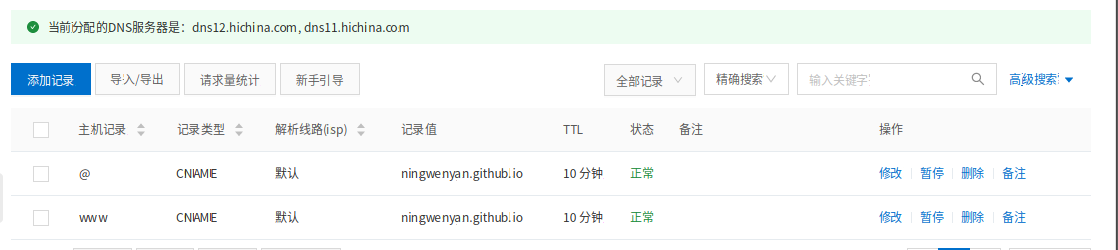
4.设定dns
我这里使用的阿里云的域名,直接绑定地址.
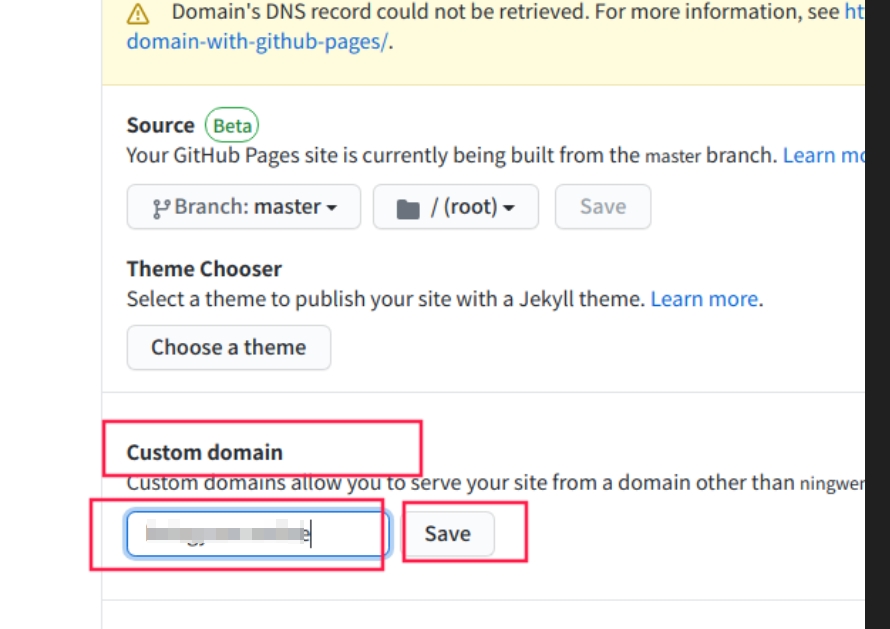
然后修改
github上的setting参数,将自己的域名绑定.
本博客所有文章除特别声明外,均采用 CC BY-NC-SA 4.0 许可协议。转载请注明来源 WenYan Blog!
 wechat
- alipay


相关推荐

评论